
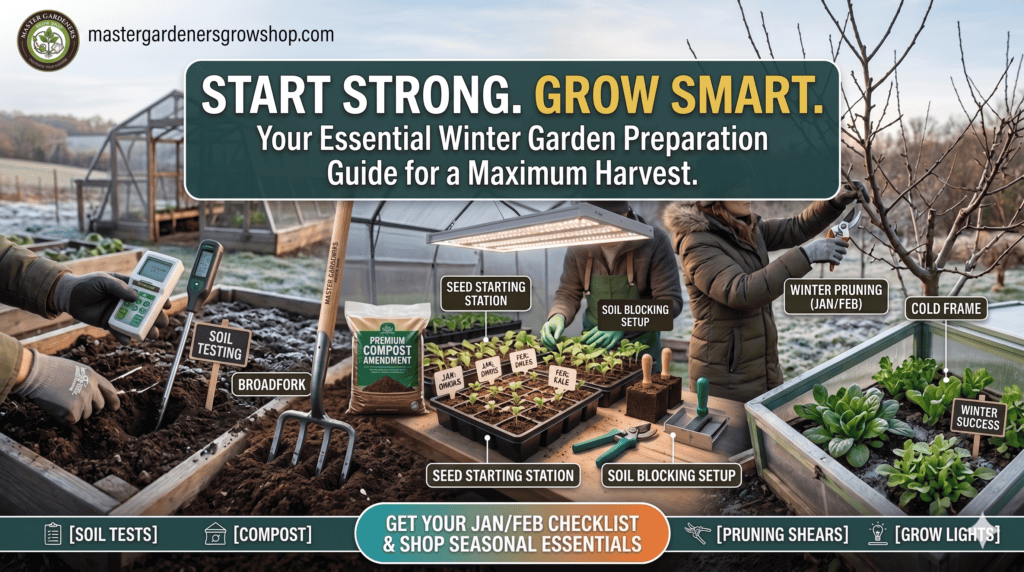
January and February might look like a slow month for gardeners, but honestly, it’s one of the favorite times of the year to focus on soil.
While your plants take a break and the ground seems quiet, you can get a real jump on the season by prepping the earth now.
Prepping your soil in January and February gives you a big advantage because healthy soil means stronger plants and better harvests later on.

Most folks skip soil work in winter, waiting for the spring planting rush. But January and February are actually a great time to test your soil, improve its structure, and add amendments—without the chaos of spring chores.
This guide covers the main soil prep tasks to tackle now. You’ll learn how to protect and enhance your soil during cold weather, plus a few other January and February jobs that set you up for a smoother growing season.
Overview of January And February Gardening Priorities

January and February give gardeners a chance to prep soil and organize their growing spaces while everything’s dormant. Focus on soil testing, planning your planting schedule, and knocking out maintenance tasks that get tricky once spring hits.
Understanding Seasonal Changes
January and February are peak dormancy for most plants across North America. With growth at a standstill, you can work the soil without disturbing roots.
Soil microbes slow down in the cold, which gives you a window to add compost or aged manure. These amendments have time to settle in before spring wakes everything up.
Ground conditions really depend on where you live. Up north, you’ll likely have frozen soil that’s impossible to dig until it thaws. In southern regions, soil often stays workable, so you can test and amend it directly.
Freeze-thaw cycles help break up compacted soil and even kill some overwintering pests. Not a bad natural bonus.
Adapting Gardening Tasks to Local Climates
Cold Climate Zones (4-6): Ground is usually frozen with snow cover. Focus on inside tasks—review soil test results from last fall and order amendments for spring.
Moderate Climate Zones (7-8): You’ll get some thawed days. Grab those chances to collect soil samples by digging down six inches.
Warm Climate Zones (9-11): Growing conditions stay active. Go ahead and test, amend, or even plant early crops.
Your hardiness zone really determines what you can do outside. Always check soil moisture—working wet soil just compacts it and messes with the structure.
Planning for the Year Ahead
Soil test results usually take two or three weeks to come back. Send samples in early January and February to get recommendations before planting time sneaks up in March or April.
Draw a garden map showing last year’s crops. This helps you rotate plant families and avoid depleting the same nutrients.
Order amendments now, based on your test results. Stuff like lime, sulfur, and organic fertilizers tends to sell out as spring approaches, and garden centers often have better prices in January.
Figure out how much compost or topsoil you’ll need for raised beds or new areas. Bulk suppliers usually offer better rates for winter delivery when things are quiet.
Soil Preparation Basics

January and February are perfect for checking your soil’s condition and tackling nutrient deficiencies before spring gets hectic. Testing pH and clearing debris now lays the groundwork for healthier plants.
Assessing Soil Condition in Winter
Even in winter, you can check soil texture and drainage. Squeeze a handful—if it forms a tight, stubborn ball, you’ve probably got clay-heavy soil that needs more organic matter.
Try sticking a screwdriver or probe into the ground. If it slides in 6-8 inches with little resistance, your soil structure’s decent. If not, you’ve got compaction, which can stunt roots and block water movement.
Winter weather plays a role, too. In freezing areas, the freeze-thaw cycle naturally breaks up clay. In rainy spots, avoid walking on soggy soil—it just packs it down and squeezes out the air roots need.
Clearing Debris and Weeds
Clear out dead plants, leaves, and old mulch before spring. That stuff can hide disease spores, insect eggs, and weed seeds that’ll cause headaches later.
Pull winter weeds while they’re still small and the soil is workable. Early removal keeps them from seeding and spreading everywhere. Most winter weeds have shallow roots, so they come out easily when the ground’s a bit moist.
Keep any cleared debris away from healthy beds. Toss disease-free material in your compost, but pitch anything that’s been hit by fungus or pests.
Testing Soil pH and Nutrients
Soil testing tells you your pH and the levels of nitrogen, phosphorus, and potassium. Most veggies and flowers do best with a pH between 6.0 and 7.0.
You can grab a home test kit or send samples to your local extension office for a more detailed readout. Collect soil from a few garden spots, mix them, and sample from 4-6 inches deep.
Test results show exactly what your soil needs. Add lime to raise pH or sulfur to lower it. The test will also flag any fertilizer or compost needs before you plant.
Improving Soil Structure in January

January’s chill slows things down in the garden, but it’s actually a great time to build better soil structure. Focus on adding organic matter, mulching, and managing moisture.
Incorporating Organic Matter
Spread 2-3 inches of mature compost on your beds now, even if the ground’s cold. Soil microbes work slowly in winter but still break down these materials.
If you planted cover crops last fall, cut them down and turn them into the soil this month. These “green manures” boost nitrogen and improve texture. Popular winter cover crops include winter rye, hairy vetch, and crimson clover.
Add well-rotted manure, leaf mold, or worm castings if you’ve got them. These materials help the soil hold water and nutrients. Work them into the top 6-8 inches when the ground’s workable.
Winter Mulching Strategies
Mulch is a winter hero. Lay down 3-4 inches of organic mulch—shredded leaves, straw, or wood chips—over your beds to prevent erosion and reduce compaction from freeze-thaw cycles.
Mulch also keeps soil temperatures steadier, letting beneficial organisms stay active longer and stopping the surface from crusting over.
Some good winter mulch options:
- Shredded leaves
- Straw or hay
- Wood chips
- Pine needles
Keep mulch a few inches away from tree trunks and plant crowns to avoid rot.
Managing Soil Moisture
January and February often bring heavy rain or snow, and too much water can compact your soil. Compacted soil loses air pockets that roots need, so avoid walking on wet beds.
If you notice low spots where water pools, mark them for later. Improve drainage by adding compost, building raised beds, or planning a drainage system before spring.
Check any covered spots or cold frames. Soil under protection can dry out, even in winter, so water if needed. Well-structured soil should feel just slightly moist, not soggy, when you squeeze it.
Amending and Fertilizing Soil

January’s a great time to boost your soil before spring arrives. Test your soil now, add organic matter, and let everything break down gradually.
Selecting Appropriate Soil Amendments
Start with a soil test to figure out what your garden actually needs. The test will show your soil’s pH and which nutrients are missing or overabundant.
If your soil is acidic (pH below 6.0), add lime to bump up the pH. Most veggies like it between 6.0 and 7.0.
Got alkaline soil (pH above 7.5)? Mix in sulfur or peat moss to bring it down. It’s not a one-and-done fix, so check again next season.
Your test results will also list nitrogen, phosphorus, and potassium levels. Low nitrogen? Try blood meal or alfalfa meal.
Bone meal or rock phosphate help if phosphorus is lacking. For potassium, wood ash or greensand do the trick.
Clay soil really benefits from compost or aged bark to help drainage. Sandy soil needs the same stuff, but mostly to hold onto moisture and nutrients.
Work these amendments in about 6 to 8 inches deep. That’s usually deep enough for roots to reach the good stuff.
Applying Compost and Manure
Spread a 2 to 4 inch layer of mature compost over your garden beds. That’s enough to feed soil life without smothering roots or wasting material.
Well-rotted manure boosts nutrients and improves structure. Cow, horse, and chicken manure all work, but make sure they’ve aged at least six months. Fresh manure can burn plants and carry bacteria.
Chicken manure packs the most nitrogen, but it needs proper aging. Cow and horse manure are milder but add more bulk. Use manure at half the thickness of compost—about 1 to 2 inches.
Work compost and manure into the top 4 to 6 inches of soil. Or just leave them on the surface as mulch if you’re not planting for a while. Winter rain and snow will help them settle in.
Using Cover Crops for Soil Enhancement
Plant winter cover crops like winter rye, hairy vetch, or crimson clover if your ground isn’t frozen. These crops stop erosion and add organic matter when you till them in come spring.
Winter rye handles cold and sends roots deep, breaking up compacted soil. It also keeps weeds down. Hairy vetch grabs nitrogen from the air and stores it in its roots.
Cut cover crops when they’re 6 to 8 inches tall, or just before they flower in spring. Till them in about 2 to 3 weeks before planting. This gives the plant material time to break down and feed your soil.
If you already have cover crops, check them for winter damage. Fill in bare spots with fresh seed on days when the soil isn’t frozen or soaked.
Protecting Soil Health During Cold Months

Winter doesn’t mean your soil should sit out in the open. Keeping it covered and mostly undisturbed helps preserve structure, hang onto nutrients, and support the living things that make your soil tick.
Erosion Prevention Techniques
Winter weather can strip away your topsoil if you leave it bare. Rain, snow melt, and wind can rob you of that rich, hard-earned layer.
Cover beds with 2-4 inches of organic mulch like shredded leaves, straw, or wood chips. This layer blocks heavy rain and keeps soil in place. As it breaks down, it adds more organic matter too.
Plant cover crops like winter rye or hairy vetch before the first hard freeze. Their roots hold soil in place all winter and help with drainage and runoff.
Got a slope? You’ll need extra help. Lay down erosion control fabric or make simple barriers with logs or stones set across the slope. These slow down water so it soaks in instead of running off.
Encouraging Beneficial Soil Microbes
Your soil teems with bacteria, fungi, and other tiny helpers that break down organic stuff and feed your plants. Cold slows them down, but you can give them a hand.
Add a layer of compost before winter sets in. It gives microbes something to chew on during the cold. The breakdown process even generates a little heat, which helps keep things going under the surface.
Keep the soil covered with organic material. Bare soil dries out fast, and microbes need moisture to survive. Mulch or cover crops help lock in that moisture and buffer temperature swings.
Avoid synthetic fertilizers in winter. They can hurt beneficial critters and cause salt to build up. Stick to organic amendments that feed the soil naturally.
Avoiding Soil Compaction
Walking or working on wet soil squashes air pockets and ruins the structure roots and microbes need. Winter soil stays wet longer since plants aren’t soaking up water.
Stay off your beds when the ground is wet or frozen. Wait until soil crumbles in your hand before stepping on it.
If you must walk in the garden, lay down boards or stepping stones to spread out your weight. That helps prevent compaction.
Don’t till or turn your soil in winter. It wrecks structure and exposes organic matter to fast breakdown. Plus, it brings weed seeds up where they’ll sprout in spring.
Now’s a good time to plan your garden layout and mark permanent paths. Keeping foot traffic on paths protects the rest of your soil. Mark paths with mulch or pavers so everyone knows where to walk.
Other January And February Gardening Tasks

January’s a chance to handle behind-the-scenes work that makes the growing season less stressful. Tuning up tools, planning your layout, and stocking up on supplies now saves you headaches later.
Tool Maintenance and Organization
Clean your
Sharpen pruning shears, shovels, and hoes with a file or sharpening stone. Sharp tools make cleaner cuts and are easier to use. Check wooden handles for splinters and sand them if needed.
Sort your tools by job or season so you can find what you need quickly. Hang long-handled tools on wall hooks to save space. Toss hand trowels and gloves in labeled bins or buckets.
Oil moving parts on pruners and loppers to keep them smooth. Replace broken tools now, not when you’re desperate in spring.
Planning Crop Rotations
Map out where each plant family will grow this year to dodge soil diseases and pest issues. Avoid planting tomatoes, peppers, or potatoes in the same spot as last year.
Basic rotation groups:
- Nightshades (tomatoes, peppers, eggplants)
- Brassicas (broccoli, cabbage, kale)
- Legumes (beans, peas)
- Root crops (carrots, beets, radishes)
Move each group to a different bed every year. This simple swap cuts down on pest eggs and disease spores in your soil.
Heavy feeders like tomatoes do best when they follow nitrogen-fixing legumes. Rotate, rotate, rotate—it’s really worth it.
Sketch your garden beds on paper or use a garden planning app. Label what grew where last year and what you’ll plant next. Keep these notes—they’ll save you time and trouble in future seasons.
Ordering Seeds and Supplies
Look over your saved seeds from last year and test their germination rates if they’re older than two years. Place 10 seeds between damp paper towels and see how many sprout after a week.
Order seeds now while you still have choices. Popular varieties sell out fast, sometimes before February. Go for certified disease-resistant types when you can—they really help later.
Buy compost, lime, or sulfur based on your soil test results. Stock up on potting mix, plant labels, stakes, and row covers while you’re at it.
Make a list of new tools or gear you need before spring. Compare prices and keep an eye out for early-season deals.
Preparing Planting Areas for Spring

January and February are the perfect times to organize your garden layout and set clear boundaries for planting. Doing this now means you’re ready to go as soon as the weather cooperates.
Defining Garden Beds
Clean out existing beds by pulling dead plants, weeds, and debris from last season. This helps keep diseases from hanging around for spring crops.
Check the edges of your beds and refresh the borders if they’ve gotten fuzzy. Clear lines make watering and mulching way easier later on.
Add a 2-3 inch layer of compost to beds about 50 days before your last expected frost. That gives the organic matter time to settle in and do its thing.
If your soil needs a bigger boost, work in aged manure or leaf mold while the ground’s still workable. Test your soil’s pH and nutrients this month so you can fix any issues before planting season hits.
Marking Out New Plots
Take some time to walk your yard on different days. Watch how sunlight moves across possible garden spaces during winter.
These patterns aren’t the same as summer, so it’s worth paying attention. Jot down which spots get at least 6-8 hours of direct sun.
Grab some stakes and string to outline any new garden areas you want to add. Mark the corners with something you won’t lose—wooden stakes or maybe metal posts work well.
Measure your planned beds and write the dimensions in your garden journal. Beds about 3-4 feet wide make it easy to reach the center from either side without trampling the soil.
If you’re turning the lawn into a garden, cover the marked area with cardboard or thick newspaper now. Pile on 4-6 inches of compost to smother grass and kickstart healthy soil for spring.